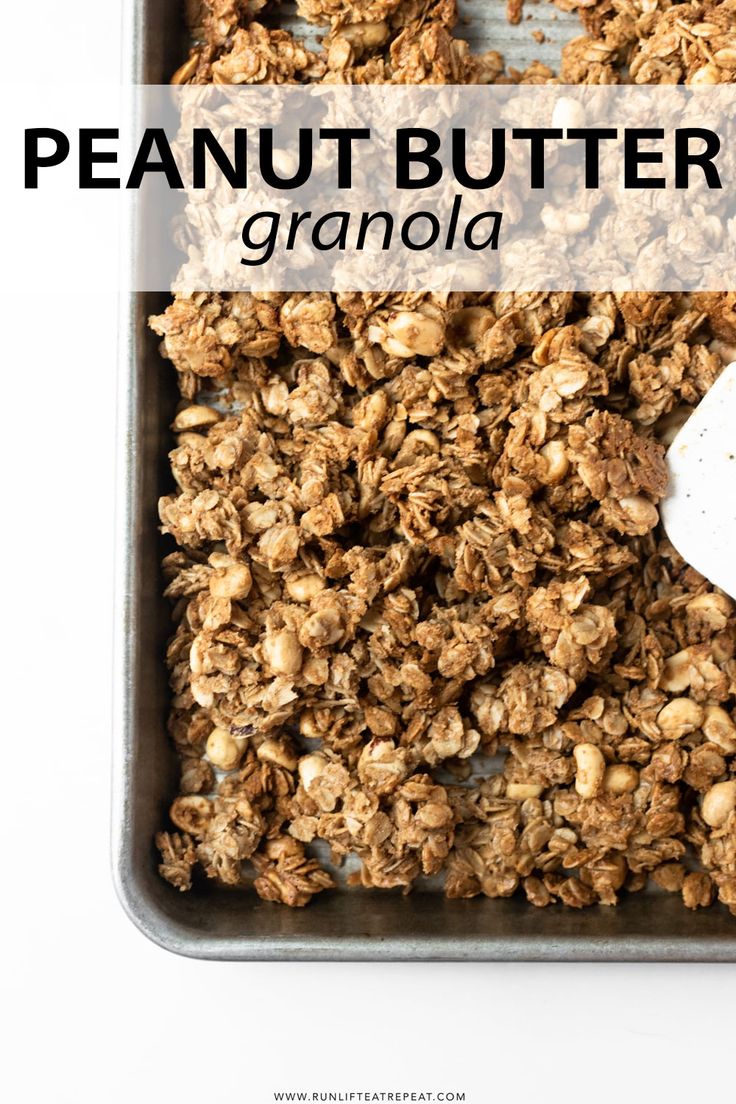
Master Crispy Peanut Butter Granola Clusters in 4 Easy Steps
Are you tired of staring at overpriced, sugar-laden granola bags in the grocery aisle, wishing for a healthier, more delicious alternative? Imagine waking up to the aroma of warm, toasted oats infused with creamy peanut butter and a hint of sweetness, all baked into perfectly crisp clusters. This isn't just a dream; it's the reality of homemade peanut butter granola, and it’s about to become your new kitchen obsession. Say goodbye to guesswork and hidden ingredients, and hello to satisfying, wholesome goodness!
For years, many of us have loved granola, but struggled with the store-bought versions. High in calories, brimming with added sugars, and often containing unnecessary preservatives, they seemed to contradict the very idea of a healthy snack. The good news? Crafting your own Why Your Homemade Peanut Butter Granola Beats Store-Bought is not only incredibly simple but also deeply rewarding. It gives you complete control over every ingredient, ensuring a nourishing treat that truly satisfies your mid-day cravings, whether enjoyed straight from the jar, sprinkled over a creamy yogurt parfait, or alongside a vibrant fruit plate.
Why Homemade Peanut Butter Granola is a Game-Changer
The allure of store-bought granola is often its convenience, but the hidden costs, both financial and nutritional, can quickly add up. Many commercial granolas pack a surprising punch of refined sugars, unhealthy oils, and artificial flavors, contributing to blood sugar spikes and leaving you feeling sluggish rather than energized. When you embark on the journey of making your own peanut butter granola, you unlock a multitude of benefits:
- Unparalleled Freshness & Flavor: There’s simply no comparison to the taste of freshly baked granola. The oats are crunchier, the peanut butter flavor is more pronounced, and the entire mix just sings with wholesome goodness.
- Ingredient Control: You dictate what goes into your bowl. Choose organic oats, natural peanut butter free from added sugars or hydrogenated oils, and your preferred natural sweetener like honey or maple syrup. This is particularly empowering for those with dietary restrictions or specific health goals.
- Cost-Effective: Once you compare the price per pound, you'll quickly realize that making your own granola is significantly more economical than purchasing premium store brands. Your pantry staples transform into gourmet-quality clusters for a fraction of the price.
- Reduced Sugar & Unwanted Additives: Say goodbye to unnecessary preservatives and artificial flavors. By making it yourself, you can dramatically reduce the sugar content, opting for just enough sweetness to complement the rich peanut butter without overpowering it. This shift makes it a much healthier option for sustained energy without the sugar crash.
Beyond these practical advantages, there's an undeniable joy in the process itself. The warm, comforting aroma that fills your kitchen as your granola bakes is an experience unto itself – a warm hug of peanut butter and honey, setting the stage for delicious mornings and satisfying snacks. This healthy, homemade alternative isn't just food; it's a testament to nourishing yourself better.
The Simple Magic: Just a Few Key Ingredients
You might be surprised to learn that truly exceptional, crispy peanut butter granola requires only a handful of common pantry items. Forget obscure superfoods or specialty flours; simplicity is the secret to its success. Here are the core ingredients that make the magic happen:
- Rolled Oats: The backbone of any great granola. Opt for old-fashioned rolled oats, not instant or quick oats. Rolled oats retain their shape and provide the ideal chewy-crispy texture that holds clusters together beautifully. For those with sensitivities, certified gluten-free rolled oats work perfectly.
- Natural Peanut Butter: This is where the star flavor shines! Choose a creamy, natural peanut butter where the only ingredients are peanuts and perhaps a touch of salt. Avoid brands with added sugars, oils, or emulsifiers, as these can affect the granola's texture and overall health profile. The natural oils in the peanut butter are key for binding and crisping.
- Sweetener (Honey or Maple Syrup): A touch of natural sweetness not only enhances the flavor but also aids in binding the ingredients and promoting that lovely golden-brown crispness. Honey offers a distinct floral note, while pure maple syrup provides a wonderful depth and makes your granola vegan-friendly. Adjust the amount to your personal preference for sweetness.
- Vanilla Extract: While often overlooked in basic recipes, vanilla extract is a flavor enhancer that adds warmth and depth, complementing the peanut butter beautifully. Don't skip it; it makes a noticeable difference!
Optional Enhancements for Extra Crunch and Flavor:
- Unsalted Peanuts: As suggested by one of our inspirations, adding whole or roughly chopped unsalted peanuts amplifies the peanut butter flavor and provides an extra layer of crunch.
- A Pinch of Salt: Just a tiny bit of fine sea salt can dramatically enhance all the other flavors, balancing the sweetness and making the peanut butter taste even more vibrant.
- Cinnamon: A dash of ground cinnamon introduces a cozy, aromatic warmth that pairs wonderfully with peanut butter and oats.
- Healthy Fats: A tablespoon or two of coconut oil (melted) or olive oil can help achieve extra crispiness and a more even bake, though it's often not strictly necessary thanks to the natural oils in the peanut butter.
These core ingredients, combined with a simple technique, are your ticket to irresistible homemade granola. And for even more ideas on adjusting your ingredients for a healthier profile, check out Craft Your Own Healthy Peanut Butter Granola: Less Sugar, More Crunch.
Your 4-Step Path to Irresistible Granola Clusters
The secret to those coveted, chunky peanut butter granola clusters lies not just in the ingredients, but in one crucial technique during the baking process. Follow these four straightforward steps, and you’ll be an expert cluster-maker in no time!
Step 1: Prep Your Workspace & Whisk Your Wet Ingredients
Begin by preheating your oven to a moderate temperature, typically around 300-325°F (150-160°C). Line a large baking sheet with parchment paper; this prevents sticking and makes cleanup a breeze. In a spacious mixing bowl, combine your wet ingredients: the natural peanut butter, honey or maple syrup, and vanilla extract. If you're adding any melted coconut oil, incorporate it here too. Whisk these together until they are well combined and smooth. The mixture should be thick but pourable.
Step 2: Combine Dry Ingredients & Bake the First Round
Add your rolled oats (and any optional unsalted peanuts, salt, or cinnamon) to the bowl with the wet mixture. Using a sturdy spatula or a clean pair of hands, mix everything thoroughly until all the oats are evenly coated. This ensures every flake gets a delicious peanut butter embrace. Spread the granola mixture onto your prepared baking sheet in an even layer. Try not to make it too thick, as this can impede even baking. Bake for approximately 15-20 minutes until the edges just begin to turn golden.
Step 3: The Cluster Secret – Press & Return to Oven
This is the pivotal step for achieving those delightful clusters. After the initial baking time, carefully remove the baking sheet from the oven. Using the back of your spatula or a sturdy spoon, firmly press the granola mixture down into a compact, even layer across the entire baking sheet. Don't just stir it; really pack it down. This crucial pressing action helps the oats fuse together as they continue to bake, creating those satisfying chunks we all love. Once pressed, return the baking sheet to the oven.
Step 4: Final Bake, Cool Completely & Break Apart
Continue to bake for another 15-25 minutes, or until the granola is deeply golden brown and appears crispy. Keep a close eye on it during this final stage, as granola can go from perfectly toasted to burnt quickly. Once baked to perfection, remove the baking sheet from the oven and here's another critical step: resist the urge to touch or stir it! Let the granola cool completely on the baking sheet, undisturbed, for at least 1-2 hours. As it cools, the sugars will harden, and the clusters will firm up. Once entirely cool, gently break the granola into your desired cluster sizes. Store your magnificent peanut butter granola in an airtight container at room temperature for up to two weeks (if it lasts that long!).
Tips for Achieving Granola Perfection (and Beyond!)
While the four steps above are foolproof, a few extra insights can elevate your homemade peanut butter granola from great to absolutely legendary:
- Cooling is Non-Negotiable: We can't stress this enough. Impatience here will result in crumbly granola, not clusters. The cooling process is essential for the clusters to set and become wonderfully crisp.
- Don't Overcrowd the Pan: For best results and even baking, ensure your granola is spread in a relatively thin layer. If you're making a double batch, use two baking sheets.
- Low and Slow is the Way to Go: Baking at a lower temperature for a longer duration ensures thorough crisping without burning the delicate oats and sugars. Keep an eye on your oven, as temperatures can vary.
- Customize Your Crunch: Once your granola is completely cooled, consider stirring in extra goodies. Dried fruits (cranberries, raisins, chopped apricots) add chewiness and natural sweetness. Chocolate chips or chunks are a delightful addition, but only add them after the granola is cold to prevent melting.
- Storage Savvy: An airtight container (like a glass jar or a sturdy plastic container) is your best friend for maintaining crispness. Stored properly, your homemade peanut butter granola will stay fresh and delicious for weeks.
- Adjust Sweetness: Feel free to experiment with the amount of honey or maple syrup. Start with the recommended amount and adjust in future batches based on your preference. You can even combine sweeteners for complex flavor profiles.
Making your own crispy, clustery peanut butter granola is not just a recipe; it's an experience. It’s about taking control of your food, enjoying incredible flavors, and discovering the simple joy of creating something wholesome and delicious from scratch. Embrace these steps and tips, and prepare to elevate your snacking and breakfast game to an entirely new level!
